Measuring Tools
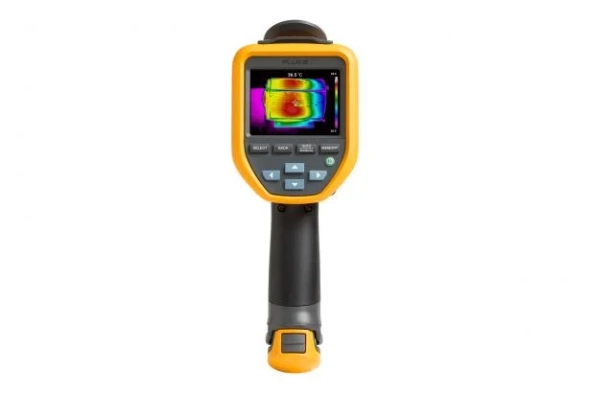
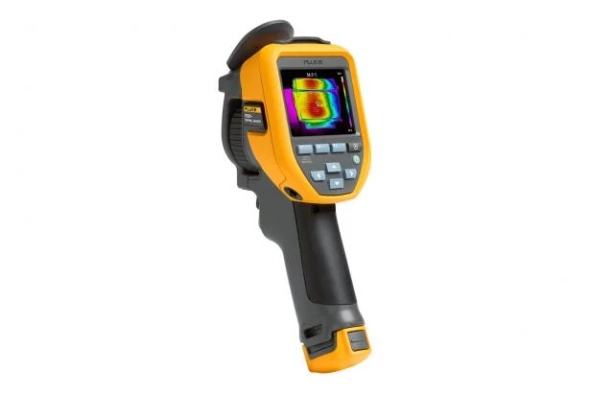
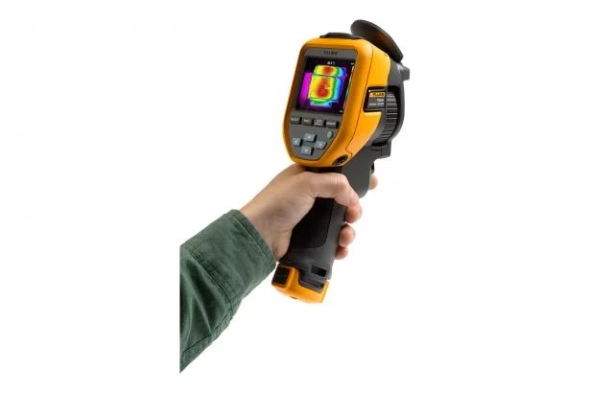
Fluke TiS55+ Thermal Camera
Strong. reliable. Accurate At Fluke, we know accidents happen, tools that are dropped, kicked, stepped on, or bumped. You do not have to change the tool if it falls off the workbench or is splashed with water or dirt. That's why we designed the TiS55+ thermal camera to withstand drops from a height of 2 meters and is water/dust resistant (IP54). You need to know that your camera is ready to use at all times.
No need for a clipboard
With so many inspections in one day, it can be difficult to remember what you saw and where it was. Maybe you brought a clipboard with you to take notes. The TiS55+ comes with a built-in personal assistant, which means you can get rid of the clipboard and have all the information you need in the pictures you take, including:
- Voice notes
Records up to 60 seconds per thermal image
Identify exactly what you see in realtime
- IR-PhotoNotes
Take a photo of the asset number and other identifiers
Use as a reference when viewing thermal images on your computer
- Asset Tagging
Sort your images by assets
Scan the QR code on your asset and start taking thermal images
Connect your camera to your computer to view images, sorted by asset
Download
Products Lainnya
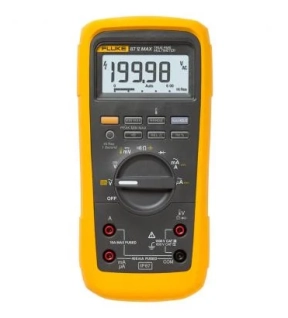
Fluke 87V MAX True-rms Digital Multimeter
The 87V MAX contains all the trusted features of the most popular DMM in use today, the Fluke 87V, with many more extras.
Withstands drops of up to 4 meters (13 feet)
Fluke's most rugged digital multimeter. The 87V MAX features a rugged case for industrial use and a removable holster. This holster also doubles as a test probe holder for one-handed operation.
IP67 rated
Completely waterproof and dustproof, to work reliably anywhere you need to work.
Heat and cold resistant
This meter has a longer operating temperature range from -40 °C (for up to 20 minutes) to +55 °C.
Another product highlight
- True-rms ac current and voltage for accurate measurements on non-linear signals
- Measures up to 1000 V ac and dc
- Measures up to 10 A (20 A for 30 seconds)
- Frequency up to 200 kHz
- Built-in thermometer allows you to freely take temperature readings without having to carry a separate instrument
- Min/Max/Average recording, plus 250 µs Peak min-max to record variations automatically
- Unique function for accurate measurement of voltage and frequency in variable frequency motor drives and other electrically noisy equipment
- Large digit display, 2 brightness levels, white backlight, and backlit keypad keys for better visibility
- High resolution 19,999 digit mode display
- Long lasting battery life (800 hours)
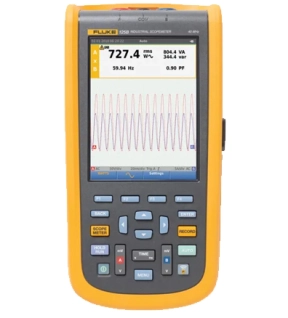
Fluke 125B Industrial ScopeMeter Hand-Held Oscilloscope, 40 MHz
The FLUKE 125B/INT is a 120B series ScopeMeter hand held oscilloscope with 40MHz bandwidth, 2 analogue channels and universal plug type. It is a rugged solution for industrial electrical and electro mechanical equipment troubleshooting and maintenance applications. This is a truly integrated test tool with oscilloscope, multimeter and high speed recorder in one easy to use instrument. It also integrates with Fluke Connect mobile app and FlukeView for ScopeMeter software to enable further collaboration, data analysis and archiving of critical test information. The 125B includes innovative functions designed to help technicians troubleshoot faster and it has rugged design to withstand 3g vibration and 30g shock. IntellaSet technology automatically and intelligently adjusts numerical readout based on measured signal. The oscilloscope is IP51 rated according to EN/IEC60529. It has 5.7inch colour active matrix TFT display (640 x 480 pixels) and qualified by 600V CAT IV, CE, CSA.
- Rise time of less than 8.75ns and input impedance of 1Mohm/20pF (without probes and test leads)
- Maximum sample rate of 400KSPS, optically isolated USB interface
- Meter and scope recorder, full function dual input scope and meter, scope cursor measurements
- Simplified testing, more insight and faster electromechanical troubleshooting
- Dual input digital oscilloscope and two 5000 count true RMS digital multimeters
- Bus health and power and harmonics measurements
- Recorder event detect captures elusive intermittent signals on repetitive waveforms up to 4KHz
- Voltage, current and power harmonics, power measurements (W, VA, VAR, PF, DPF, Hz)
- Dimension is 259mm x 132mm x 55mm (10.2inch x 5.2inch x 2.15inch) and weight is 1.4Kg
- Operating temperature range from 0°C to 40°C (battery operation) & 0°C to 50°C (power adapter)
Applications
Test & Measurement
Contents
Fluke 125B hand held oscilloscope, Shielded test leads with black ground leads, Black test lead (for grounding), Hook clips (red, blue), Banana to BNC adapters (black, x1), 10:1 voltage probe, i400s AC current clamp, USB angled adapter, Wi-Fi USB adapter, Switch mode power supply, Adapter/battery charger, Rechargeable Li-ion battery pack.
Footnotes
In addition, we have calibration services for this product. Choose from a Standard Certificated Service or an internationally recognised UKAS accredited calibration. Visit our calibration service page for more details.
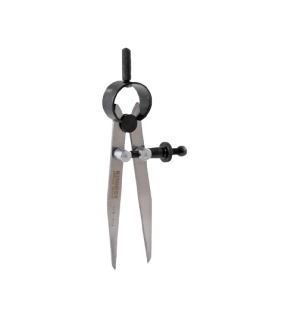
Kennedy 4" SPRING TYPE DIVIDERS-SOLID NUT
Manufactured from high quality polished steel. Ground finished points, a fine adjusting screw is mounted across the legs for setting the distance between the two points. A circular spring bow joins the legs, with a knurled extension attached for use when pivoting the dividers. Dividers are used for scribing arcs and circles, a light centre punch mark on the work keeps the pivot leg in the centre while marking.
Features and Benefits
• High quality polished steel with ground finished points
• Adjusting screw mounted across the legs for setting distance between points
• A light centre punch mark on the work keeps pivot leg in the centre while marking
• Ideal for use in scribing arcs and circle applications
Features and Benefits
• High quality polished steel with ground finished points
• Adjusting screw mounted across the legs for setting distance between points
• A light centre punch mark on the work keeps pivot leg in the centre while marking
• Ideal for use in scribing arcs and circle applications
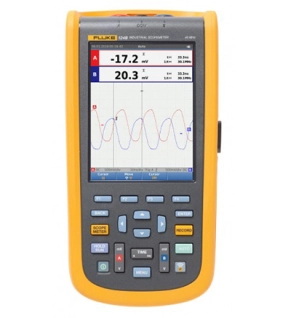
Fluke 124B Industrial ScopeMeter Hand-Held Oscilloscope, 40 MHz
Fluke 124B Offers
Compact and rugged, this oscilloscope is ideal for industrial electrical and electro-mechanical equipment troubleshooting and maintenance applications. Features innovative functions that help technicians troubleshoot faster for quicker results and to keep their systems running smoothly. Additionally, triggering displays waveforms without having to adjust amplitude, timebase, and trigger settings.
Features
- Key measurements: Voltage and power waveforms
- Automatically capture, view and analyze complex waveforms: Fluke Connect and View™ triggering automatically displays waveforms without having to adjust amplitude, timebase and trigger settings, while Intellaset™ technology analyzes the signal and automatically displays critical numerical readings, making troubleshooting faster than ever
- View data locally on the instrument, or via Fluke Connect mobile app
- Dual-input digital oscilloscope and multimeter
- 40 MHz oscilloscope bandwidth
- Two 5000-count true-rms digital multimeters
- Connect-and-View trigger simplicity for hands-off operation
- IntellaSet technology automatically and intelligently adjusts numerical readout based on the measured signal
- Dual-input waveform and meter reading recorder for trending data over extended periods
- Recorder Event Detect captures elusive intermittent signals on repetitive waveforms up to 4 kHz
- Shielded test leads for oscilloscope, resistance and continuity measurements
- Resistance, continuity, diode and capacitance meter measurements
- Power measurements (W, VA, VAR, PF, DPF, Hz)
- Save or recall data and instrument setups
- Store instrument setups defined by a test sequence for routine maintenance or most often used test procedures
- External optically isolated USB interface to transfer, archive and analyze scope or meter data
- Optional WiFi adapter connected to internal USB port to wirelessly transfer information to the PC, laptop or Fluke Connect mobile app
- Rugged design to withstand 3 g Vibration, 30 g shock, and rated IP51 according to EN/IEC60529
- Highest safety rating in the industry: safety rated for CAT IV 600 V
Connect-and-View triggering for an instant, stable display
Oscilloscope users know how difficult triggering can be. Using the wrong settings can lead to unstable waveform captures, and sometimes the wrong measurement data. This instrument's unique Connect-andView triggering technology recognizes signal patterns and automatically sets up the correct triggering to provide a stable, reliable, and repeatable display. Connect-and-View triggering is designed to work with virtually any signal, including motor drives and control signals - without adjusting parameters, or even touching a button. Signal changes are instantly recognized and settings are automatically adjusted, providing a stable display even when measuring multiple test points in quick succession.
IntellaSet/AutoReading
The Auto Readings function with Fluke IntellaSet technology uses proprietary algorithms to intelligently analyze the measured waveform and automatically displays the most appropriate numerical measurements on the screen, so you can get the data you need easier than ever before. As an example, when the measured waveform is a line voltage signal, the Vrms and Hz readings are automatically displayed, whereas if the measured waveform is a square wave, the Vpeak-peak, and Hz readings are automatically displayed. Using IntellaSet technology in conjunction with Connect-and-View automatic triggering you can be sure you're seeing not only the correct waveform but the appropriate numerical reading as well. All without touching a button.
Industrial equipment needs a reliable power supply to operate properly, use the dual input to obtain key power measurements
For single-phase or 3-phase balanced systems, the dual inputs of the Industrial ScopeMeter 120B Series can measure AC+DC RMS voltage on channel A and AC+DC RMS current on channel B. This oscilloscope can then calculate; frequency, phase angle, active power (kW), reactive power (VA or var), power factor (PF), or displacement power factor (DPF) and can also calculate the power values for a 3-phase system where all phases have equal voltage and currents. This applies to both balanced systems and resistive loads.
One test lead to measure multiple electrical parameters
High-frequency waveform, meter, capacitance, and resistance measurements as well as continuity checks are all covered by a single set of shielded test leads. No time is wasted finding or swapping leads.
Fluke Connect mobile app compatibility
Automated industrial machinery is harder than ever to troubleshoot. It's not enough to just know where you have to test, you also have to know what to look for and that can be hard without baseline measurement data or access to subject matter experts. This Fluke Connect Assets wireless system of software and wireless test tools enables technicians to reduce maintenance costs and increase uptime with accurate equipment records and maintenance data that is easy to interpret, and share. Compare and contrast test point measurement data and trends so you can better understand signal characteristics and changes over time. And, by storing maintenance data on the Fluke Cloud you can enable team members to access it from wherever and whenever they need to so you can get advice or approvals in the field and get your systems up and running faster than ever before.
Use the comprehensive recorder modes to help find intermittent faults with ease
The toughest faults to find are those that happen only once in a while-intermittent event. They can be caused by bad connections, dust, dirt, corrosion, or simply broken wiring or connectors. Other factors, like line outages and sags or the starting and stopping of a motor, can also cause intermittent events resulting in equipment shutdowns. When these events happen, you may not be around to see them. But, your Fluke ScopeMeter Test Tool will. You can either plot the minimum and maximum peak measurement values or record the waveform trace. And, with expandable micro SD memory, recording sessions can be done for up to 14 days. This recorder is even more powerful with the addition of Recorder Event Detect, which makes detecting and logging intermittent faults easier than ever. Just set a threshold on a meter reading or scope trace and deviations are tagged as unique events. You no longer need to search through masses of data to pinpoint faults, and can quickly step from one tagged event to the next, while still having access to the full data


